
LinkedIn is an excellent platform for expanding your professional network, but finding and contacting the right people can be challenging. While LinkedIn messages are great for communicating with those in your immediate circle, they may not be enough when trying to reach someone outside your network. That’s where LinkedIn’s Send InMail feature comes in handy, allowing you to contact anyone on the platform regardless of your connection status.
Thankfully, InMail can help you overcome this hurdle by facilitating communication with a broader pool of LinkedIn users. With InMail, you can expand your reach beyond your existing connections and establish meaningful professional relationships with new contacts on the platform.
What’s the Difference Between InMail and Regular Messages?
If you’re a LinkedIn member, you have the ability to send messages to your first-degree connections and other members within your groups without any additional requirements. However, with InMail, you can communicate with anyone on the platform, including those who are not in your immediate network. Essentially, this means that you can initiate conversations with second and third-degree connections without having first to invite them to connect.
What Do I Need To Send LinkedIn InMail?
To get started with sending InMail on LinkedIn, it’s important to note that you’ll need to have a Premium account. If you’re currently using a free account, you’ll be prompted to upgrade before being able to send messages.
The number of InMail credits you’ll receive monthly will depend on your chosen subscription level. Here’s a breakdown of how many credits each subscription gets you:
- Premium Career: 5 credits
- Premium Business: 15 credits
- Sales Navigator: 50 credits
- Recruiter Lite: 30 credits
Keep in mind that each credit is equivalent to one InMail message. Alternatively, if the recipient is a Premium subscriber and a member of the OpenLink network, members can send InMail for free.
If you plan to use LinkedIn’s Send InMail feature to reach out to someone, it’s important to note that members can opt out of receiving InMail messages in their preferences. To ensure your message is received, the recipient must have InMail receiving turned on.
How To Send InMail
When it comes to sending messages on LinkedIn, using InMail isn’t much more complicated than regular messaging. Here’s how you can do it in just four easy steps:
- First, search for the person you want to message and go to their profile.
- Look for the message button below their profile and click on it. Note that if you’re not a Premium user, you may see a pop-up window encouraging you to upgrade your subscription.
- Once you’re in the message window, enter your subject and type out your message. The great thing about InMail is that you can write messages of up to 2,000 characters and see your remaining credit balance as you type.
- Finally, hit the send button to deliver your message to the recipient. That’s it! With these simple steps, you can use InMail to connect with others on LinkedIn.
What InMail Costs
The cost of InMail will vary depending on the premium subscription you choose and the number of credits required in a given month.
At the end of each month, any unused credits will be added to your balance and can be used for up to 120 days. If you exhaust your InMail credits during the month, there is no option to purchase more, except with Recruiter Lite, which allows you to buy additional InMail credits in packs of 10.
It is important to note that credits cannot be transferred between accounts and will be forfeited if you cancel your subscription.
Best Practices for Sending InMail Messages
If you are already connected with someone on the platform, sending them a message is a breeze since you have established familiarity with each other. However, sending an InMail is a different ball game. As you have a limited number of InMail credits, you must craft your messages carefully to ensure that you make the most of your monthly message quota and receive responses.
Follow these helpful tips to optimize your InMail communication and maintain high response rates.
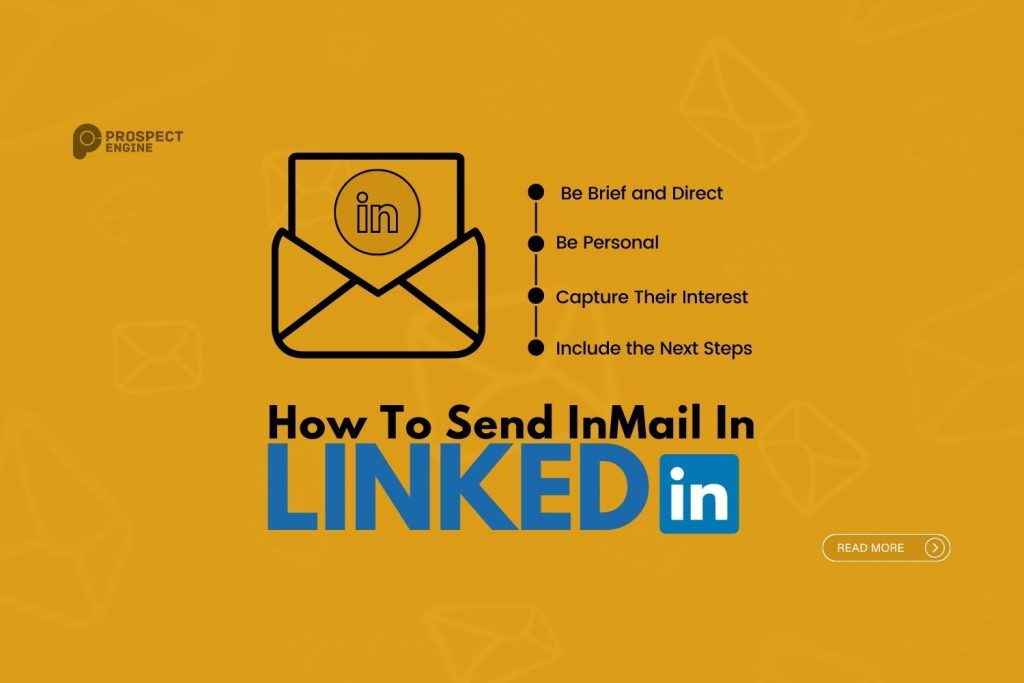
Be Brief and Direct
When you “Send InMail,” it serves as a conversation starter. However, it’s best to avoid including all the details and instead opt for a concise and clear message. This approach is endorsed by LinkedIn, which reports that InMails with less than 800 characters receive above-average response rates. Conversely, longer messages tend to receive below-average responses.
Since the recipient of your “Send InMail” is likely busy and receives numerous messages, keeping your note brief makes it easier for them to read and reply. Generally, a short message that includes essential information, such as the reason for your outreach and what you’re hoping for them to do, is sufficient.
Be Personal
When you “Send InMail” on LinkedIn, using templates can save time, but they may not be as effective. Although there are numerous templates available online, they lack a personal touch and could be perceived as impersonal. A LinkedIn study found that personalized InMail messages have a 15% higher response rate than bulk messages, emphasizing this point.
To get better results when you “Send InMail,” showing interest in the recipient and tailoring the message to their personality is crucial. Writing original InMails whenever possible is recommended. If you must use templates, customize each message before sending it to ensure that it resonates with the recipient.
Capture Their Interest
To make your InMail message stand out, try incorporating something that could catch the recipient’s attention. This could be a recent post they shared, an intriguing tidbit you came across on their profile or even something you both have in common. Doing a little research can go a long way in creating an engaging and compelling message. Take advantage of the information that you gather from their interests and the content they post, and use it to craft a message that is both attractive and personalized.
Include the Next Steps
Increasing the likelihood of receiving a reply can be achieved by providing clearly-defined steps for the recipient to take after reading your message. Limiting your requests to simple and quick actions, such as seeking advice or a referral or arranging a follow-up conversation, is advisable.
However, avoiding overwhelming the recipient with too many requests in your initial communication is important, as this could scare them off. Keep the requests to a minimum to make a positive first impression and encourage a response.
Do More With LinkedIn InMail Messaging
Once you understand how to send InMails, the next step is to integrate them into your LinkedIn strategy. Despite the fact that you need to have a subscription to use this feature, it can be an incredibly powerful tool in your outreach efforts. In fact, it enables you to connect with potential employees, B2B decision-makers, or even your future employer, even if you don’t have an existing connection with them.
If you’re having trouble sending impactful “Send InMail” messages on LinkedIn, look no further than Prospect Engine for assistance. Our website provides a comprehensive range of free resources to guide you through every step of your LinkedIn journey. We can even help you create a personalized and efficient LinkedIn strategy, from prospecting and messaging to closing deals. Contact us today to schedule a complimentary consultation and get the most out of your “Send InMail” efforts.